
KEY POINTS
- Yield monitors and related equipment should be calibrated prior to harvest.
- Calibration is necessary for each specific crop to be harvested.
- Properly calibrated grain yield monitors can provide a more accurate yield estimate for the products planted across the farm and by location of the products in the field.
- Recalibration during harvest may be necessary due changes in environmental or crop conditions,
if significant changes in grain moisture occur (> 4%), or if any repairs or adjustments directly impacting the performance of the combine are made.
Prior to Calibration and Harvest
- Read and understand the user manual for the yield monitor system and combine prior to harvest.
- Check for software updates for both the yield monitor display and the computer in your office. Troubleshooting from the combine cab or office can be easier when the latest software version is installed, as updates allow for optimal yield monitor function.
- Clean and inspect mass flow and moisture sensors. Periodic cleaning during the harvest season may be necessary.
- Inspect mechanical items for wear, especially major components such as the clean grain elevator chain/paddles, the rotor or cylinder, and the concave and cleaning systems, as these can impact combine performance.
- Inspect the GPS receiver and all electrical connections and cables for wear and replace if needed. Also turn on the yield monitor display to ensure it is working and that you have a connection to the GPS receiver.
- Yield data from last season should be downloaded to a computer or remote drive and the data deleted from the data card (if applicable) to make room for new data this season.
Obtaining Accurate Yield Data
- Calibration at the beginning of harvest is critical to obtaining accurate yield data.
- The yield monitor needs to be calibrated for each type of grain to be harvested.
- Calibration loads should be collected in representative areas of the field(s).
- After the initial calibration, if any components that impact the threshing, cleaning, and movement of grain within the combine are changed or replaced, a re-calibration of the monitoring system will be necessary.
- Consider backing up data onto a computer or data storage device frequently throughout
the harvest season.
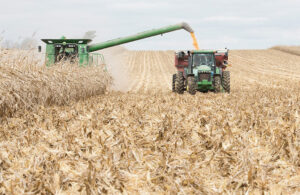

Figure 1. Proper calibration of the yield monitor is the only way to ensure an accurate estimate of crop yields.
Calibrating a Yield Monitor
Prior to calibration, make sure any adjustments that can influence the threshing performance of the combine such as rotor speed, concave opening, and chaffer and sieve openings are already set. Do not make these adjustments during the collection of calibration loads as that could influence the accuracy of the calibration.
Generally, the components of a yield monitoring system that can impact the accuracy of yield data calculations the most are the mass flow and grain moisture sensors. Accurate distance, speed, and header cut width are also necessary for quality yield data.
Several steps are necessary for calibrating yield monitors, but there are differences among the various systems on the market today. Iowa State University’s Digital Ag team has developed an online interactive yield monitor guide which can be found by clicking on this link: https://sites.engineering.iastate.edu/darr/display/
Mass Flow Sensor
The mass flow sensor or impact sensor must be calibrated to achieve an accurate grain weight. Some combine manufacturers now offer yield monitors with self-calibrating systems that require little or no input from the operator. Otherwise, calibration steps typically include the following, though refer to the manufacturer’s specific procedure:
- For multi-point calibrations (also called non-linear calibration): Harvest three to six separate calibration loads. Each load should represent different flow rates, which is achieved by harvesting at different speeds. For example, if your normal operating speed is four miles per hour (mph), harvest one or two calibration loads at that speed, and then additional loads at 2, 3, and 5 mph. The different flow rates represent different yield levels to the yield monitor. Each load should be between 3,000 and 8,000 pounds. Typically, multi-point calibrations improve accuracy and can better capture the variability that often occurs naturally within a field.
- For near-linear (single point) calibration: Usually requires only one or two calibration loads. However, larger loads of perhaps as much as 25,000 pounds (about 450 bushel of corn) are recommended.
- Weigh each load with a weigh wagon, grain cart, or other accurate scales such as your local grain elevator. If weighing a load on a grain cart, the cart should be stationery for accurate information. To increase accuracy, weigh wagons or grain carts (equipped with scales) should have the scale system calibrated prior to harvest.
- Enter the weight of the calibration load into the yield monitor display.
- Debris can accumulate behind a mass flow sensor which could lead to inaccurate yield data, so periodic checking/cleaning of that area is recommended.
Grain Temperature Sensor
For yield monitoring systems that include grain temperature sensors, calibration of that sensor should be completed prior to the grain moisture sensor calibration. Temperature calibration should be done while the combine has been sitting idle for several hours, preferably in a shaded area.
Moisture Sensor
Grain moisture content of each calibration load should be tested with a handheld moisture meter or with a moisture meter at the grain elevator. Most moisture sensors in yield monitoring systems can provide good estimates if the grain moisture is between 10% and 33%. Values outside of that range are likely to introduce too much error into the yield calculations.
- One method for calibrating a moisture sensor is to use an average moisture reading from multiple samples.
- Consider calibrating the moisture sensor for corn below 20% moisture and recalibrate for corn above 20% moisture.2 Corn at 25% moisture moves through a combine much differently than corn at 17% moisture.
- Periodic checks of the moisture sensor during the harvest season are a good idea, especially if there is likely to be a wide range of grain moisture from the first harvested field to those harvested later in the season.
Lag Time Setting
Lag time is the amount of time it takes for grain to pass through the combine. The flow starts at the header, then passes through the feederhouse, the threshing cylinder or rotor, the cleaning system, then to the top of the clean grain elevator striking the mass flow sensor, and finally to the grain tank.
- Count the seconds it takes from the time the crop is cut by the header until you start to see grain enter the grain tank on the combine. Subtract one or two seconds from that value since the mass flow sensor is ahead of the point where the grain enters the tank.
- For most machines, the lag time is around 10 to 15 seconds. However, each machine can be different, and lag time can also be affected by crop condition.
- Yield maps should show each pass lining up on the headland. If every other pass is longer and shorter, you probably need to adjust the lag
time setting.
Distance Traveled
Accurate ground speed and distance traveled are necessary to accurately record yield per acre. For most yield monitoring systems, the global navigation system should measure the speed of the combine as well as the actual location of the machine within the field. In some cases, a manual distance calibration might be necessary. If so, the distance calibration should be checked against a known distance to help ensure the correct distance is recorded. Use a distance of at least 500 feet within normal field conditions. Maintaining a constant speed within the calibrated speed range is desirable; however, sometimes unavoidable, abrupt changes in speed can lead to errors in the calculated yield data.1 If possible, the operator should try to have the combine up to operating speed at the beginning of each pass before the header engages the crop, as well as when leaving the standing crop at the end of a pass. This “rolling start” can help avoid large yield differences at the beginning or end of each harvested pass.
Header Height Sensor
Raise and lower the header to make sure the stop height switch operates correctly. The header height determines the beginning and ending of data logging into the monitor and also determines the area of accumulation. If the height switch is properly set, the machine will stop logging data points when the header is raised at the end of a pass and start logging data again when the head is lowered for the next one. Failure to disengage the header height switch at the ends of rows can result in inaccurate acreage estimates and inaccurate yield data.
Header Swath Width
The width of cut of the crop by the header is a measurement critical to achieving accurate yield data. Most recent yield monitoring systems have the ability to compensate for varying swath widths based on the field coverage of previously harvested areas of the field. This helps to provide accurate results when harvesting point rows or passes at less than the cut width that is entered into the yield monitor display.
Daily Pre-Harvest Routine
- Develop an in-season yield monitor checklist of all adjustments and settings.
- Go through the yield monitor checklist every morning prior to harvesting.